Email Obfuscator Walkthrough
The purpose of this page is to present a short walkthrough on how to use the Email Obfuscator Tool (if you don't know what this is, see the parent site). The walkthrough is split into two sections:
Single File Obfuscation
The first step is to start up the program. See instructions on how to do that here. If the program is running correctly, the window in front of you should look like this:

Here, select "Single *.htm or *.html file.", and click "OK". A dialog should popup asking you if you want to use the simple version of the email validator:

For most cases, the simple validator will be enough, so if you are not sure, select "YES". For details when the simple validator will not be enough, plese click here. The GUI for single file processing should then appear, and look something like this:

The next step is to select the source file to process. You have to click the "Browse" button next to the source file label. In the file chooser that appears, find the file you wish to process, and click "OK". If the file was selected successfully, the window should now look something like this, with the information message "Source file successfully selected." appearing in the bottom information bar:
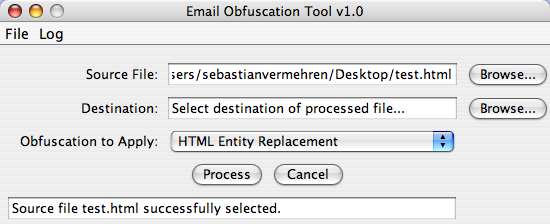
In this case, the file selected is called test.html, and resides on my desktop. The next step is to select the "Destination". This will be the directory where the processed file will be saved in. The tool will copy the source file to the destination you select, and will then alter the copied file. The source file itself will NOT be modified! To select the destination, click the "Browse" button next to the destination label. Find and select the destination file in the file chooser that appears, and click "OK". If the directory was selected successfully, the window should now look something like this, with the information message "File copied to destination directory." appearing in the bottom information bar:

In this case, the destination selected is a directory on the desktop called test. The next step is to select the type of obfuscation to apply to the file chosen above. For details of the different currently implemented techniques, please click here. In this case, I would like to use the JavaScript obfuscator, so I select it:

Now you are ready to process the file. Click the "Process" button, and wait for processing to complete. If any problems occurred, you will be notified. If the obfuscation completed successfully, the GUI should look something like this, with the message "Obfuscation completed successfully. See log for details." in the bottom information bar:
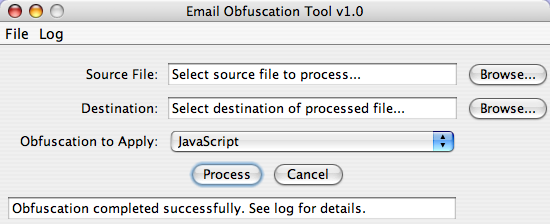
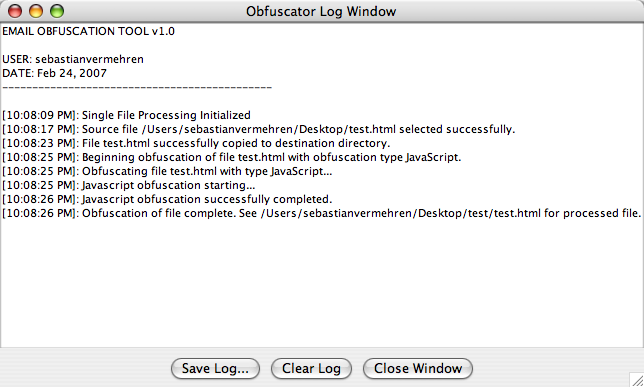
Now you're done! You will find the processed file in the directory previously specified, with the same name as the source file. In my case, the obfuscated file will be in the test folder on my desktop, called test.html. To see the exact path of the destination, you can click the "Log" menu, and then on "View Log" to view the log. The lowest message will give you the path of your file:
Archive Obfuscation
The first step is to start up the program. See instructions on how to do that here. If the program is running correctly, the window in front of you should look like this:

Here, select "Archive or directory of *.htm or *.html files.", and click "OK". A dialog should popup asking you if you want to use the simple version of the email validator:

For most cases, the simple validator will be enough, so if you are not sure, select "YES". For details when the simple validator will not be enough, plese click here. The GUI for archive and directory processing should then appear, and look something like this:

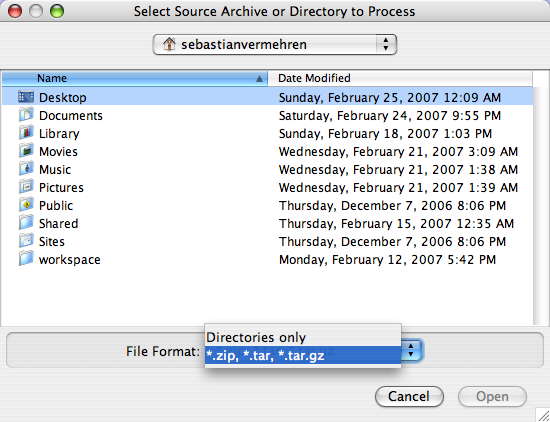
The next step is to select the source archive or directory to process. First, you need to press the "Browse" button next to the "Archive to Process" label. This should open a file chooser where you can select the source. The default setting is to allow selection of only archive files. In order to select a directory, you must change the file format selection at the bottom of the file chooser. Depending on your operating system, it might look slightly different, but it's always a selection box at the bottom of the chooser, like this (on Mac OS X):
Once the directory or archive is selected, click "OK". If the file was successfully selected, the window will look something like this, with the information message "Source file your-filename-here successfully selected." appearing in the bottom information bar:
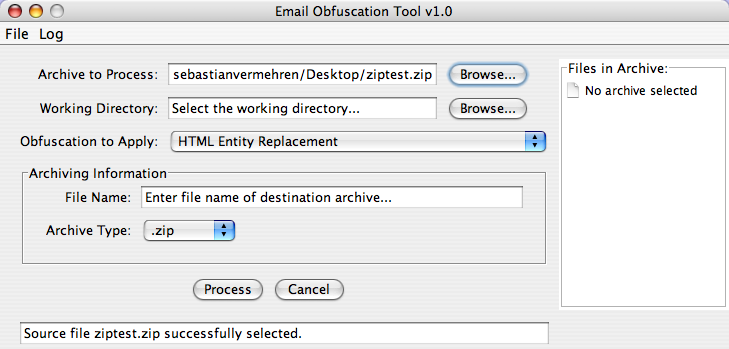
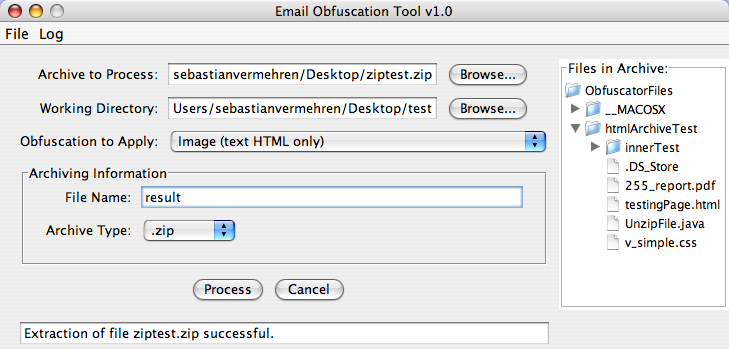
In this case, I selected an archive file called ziptest.zip residing on my desktop. The next step to take is to select the "working directory". The working directory is the directory where the resulting archive file will be available after obfuscation, and where the files to process get temporarily unarchived to. The tool will create a new folder in the working directory, and unarchive the files into it (or copies them if a directory was selected). It is then from here where the files will be processed, meaning that the original source file/directory will NOT be modified or changed in any way. To select the working directory, click on the "Browse" button next to the working directory label, find and select the desired working directory in the file chooser that appears, and then click "OK". Once the working directory is selected, the files in the archive/directory are unarchived/copied into the working directory, after which the tree on the right hand side is populated with the files that were copied from the source. The tree can be looked through to verify that the correct files have all been copied over. If no errors arise, the GUI window should look something like this, with the information message "Extraction of file your-file-name successful.":

In this case, the working directory is a directory called test on the desktop. On the right in the tree are the files which were zipped in the ziptest.zip archive file. The next step is to select the type of obfuscation to apply to the file chosen above. For details of the different currently implemented techniques, please click here. In this case, I would like to use the image obfuscator, so I select it:

The next step is to enter the file name of the resulting archive file. Once the files are processed with the obfuscation applied, the tool re-archives the files into a file with a filename which needs to be specified. In this case, I decide to call the resulting file "result":
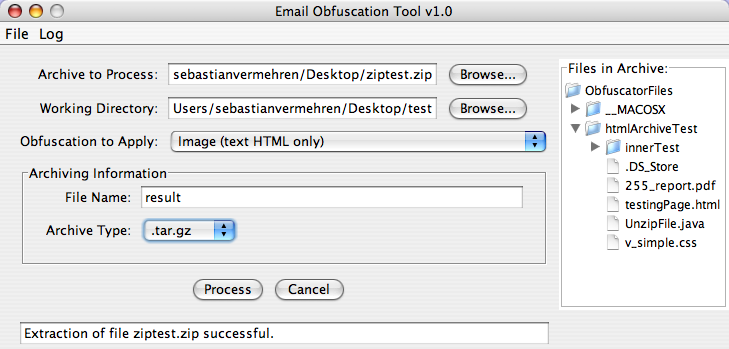
Finally, the last item that needs to be specified is the type of archive to re-archive the processed files into. In this case, I chose the .tar.gz archive extension:
Now you are ready to process the file. Click the "Process" button, and wait for processing to complete. During processing, the progress bar appears to keep you informed of the progress:

If any problems occurred, you will be notified. If the obfuscation completed successfully, the GUI should look something like this, with the message "Processing complete. See log for details." in the bottom information bar:

Now you're done! You will find the re-archive file in the working directory, with the name and extension specified. In my case, I will find the file in the test folder on my desktop, in the file result.tar.gz. To see the exact path of the destination, you can click the "Log" menu, and then on "View Log" to view the log. One of the last messages in the list will be that where the resulting file is stored:
